Posted on Leave a comment

Cleaning your linens

Taking care of your beautiful household linens – Table cloths:

With the best will in the world,  stuff gets spilled, and some things are more difficult to remove than others.

For a general wash;

  • Treat any normal stains with an oxygen-based or colour safe bleach, following the directions regards pre-soaking etc. We advise not using chlorine bleach as this can damage the textile.
  • A hot wash with a regular detergent on the delicate cycle should wash clean the table cloth, and help to keep the fringe from getting tangled.
  • To minimize or avoid ironing, lay the table cloth out wet from the wash on a counter or table, smooth out the wrinkles, and then hang so it falls straight. Otherwise, a short tumble dry – again, this is to keep the fringe maintenance down to a minimum.
  • Once dry, fold carefully and store under other linens so that the folds will set as seen in period art.
  • Alternatively, you can iron the patterns in as desired with a hot iron and steam.

To remove candle wax

There are a number of ways to achieve this but our preferred method (and one used in period) is as follows;

  • simply scrape off the excess candle wax;
  • lay several sheets of CLEAN (non-waxed) paper underneath the candlewax spill and another sheet of paper on top of the area;
  • with the iron on a low heat, gently iron over the spot to allow the brown paper to draw out the oily residue left behind (yes, they did have irons, though it took considerably more technique and experience to use them);
  • IMPORTANT!! Keep the Iron moving so that you don’t burn the fabric!
  • Move the affected area onto fresh sections of the paper so that they can draw the oils more efficiently.

To aid with the removal of Red wine stains;

  • Mop as much as you can but do NOT rub at the red wine, it will just grind into the fibers;
  • If you can (depending on the state of the diners), dilute the stain with water ( or soda water) and mop with a clean towel;
  • Then (and this would have been an expensive fix in period), pour a generous amount of salt onto the freshly mopped red wine spill and allow it to dry;

Wash as usual, but before drying, check to see if the stain is still there, some stain may require stronger solutions to deal with any residual stain.

Posted on Leave a comment

Medieval Rosaries and Ebeds.

Ebed was the term commonly used to describe the strings of beads used by medieval Christians as a mnemonic device to count and remember their prayers. Today we are more familiar with the word ‘Rosary’; a term derived from the latin Rosarium meaning ‘wreath’ with its etymology linked to popular piety and in popular use in later period. 

Use of Ebed’s in the western world can be traced back to the 13th Century Carthusian and Dominican monks. Between the 12 to the 15th century, the Ebed came in many styles to suit the purse and taste of the owner. The 2 main types were either circular or linear strings of knots or beads. 

The beads were called ‘bede’ in old English -meaning to request in prayer’. The exact number of beads in a string or group was by the request of the owner as was the presence of paternosters and other accessories (eg wounds of Christ). The formalisation of beads into groups (or ‘mysteries’) was not common until after the 15th century.

Typically, medieval period depictions show linear Ebeds worn by men, and circular by women, but there are also plenty of exceptions. The string can be worn attached to the belt/girdle, pinned to the upper chest, around the neck or looped around the wrist. 

Posted on

St Valentine’s Day -it’s always Chaucers’ fault

It’s probably Chaucer’s fault that we associate Valentine’s Day with romantic love.
February 14th was a day to remember the deeds and martyrdom of Saint Valentine, with no particular romantic significance, until Geoffrey Caucer penned ‘Parlement of Foules” (Parliament of Fowles) in 1381. Chaucer’s poem describes all of the birds being brought together by mother nature on Saint Valentine’s Day to choose their mates.

This noble emperesse, ful of grace, Bad every foul to take his owne place,
As they were wont alwey fro yeer to yere, Seynt Valentynes day, to stonden there.

By mid February, as winter frosts thawed, people would see birds becoming more active around them, seeking each other out. Medieval people took to the idea of a day in late winter where we seek out a mate and bring them shiny gifts, and St Valentines Day has become cemented as a secular celebration of romantic love.

The rebrand hasn’t been bad for St Valentine, with many modern people celebrating his saint’s day long after St Frumentius and St Godelva passed into obscurity.

Posted on

What do I need to start hand sewing?

Historical hand sewing requires a few different supplies to get started, which might not be easily available from your local sewing store.

That’s why we’ve curated our beginning hand sewing kit with everything you need to start handsewing the medieval way.

In the kit is, high-quality linen thread in the appropriate weight should be waxed with beeswax before use. This helps strengthen the thread and makes it smoother which makes for easier sewing as the thread glides more easily through the fabric. Linen thread, especially hand sewing linen threads, can have slubs and the beeswax helps that go through the fabric more easily as well.

Good quality needles are also worth having for long sessions of hand-sewing and the thimble drives the needle without hurting the fingers, a necessity for a long sewing session.

The tailors awl is for the common task of eyeleting and the snips are for snipping the thread.

The kit contains:

  1. Linen thread – 10m samples of Swedish Bockens Lingarn 35/2, 60/2 and 90/2 on wooden spools
  2. Good quality assorted sharp and crewel needles
  3. Pins
  4. Needle storage cloth
  5. Thimble
  6. Beeswax
  7. Thread Snips
  8. Modern tailors awl
  9. Cotton bag.

Buy your hand sewing kit here

Posted on 1 Comment

Comparison of Linen Threads to Sewing Machine Threads

You might have noticed that our linen hand sewing threads have a Nel number code to describe their thickness, like 60/2 for our ‘light’ thread. The first number refers to the weight of each strand, with higher numbers being lighter weights, and the second number being the amount of ‘plies’, or strands, that are twisted together.

A handy way to think about thread sizes is by dividing the weight number by the ply number to get the total weight. A 60/2 linen thread is 2 plies of #60 linen, so 60/2 is the same weight as #30, also known as 30/1.

Standard sewing machine thread converts to be equivalent to 120/2 in the Nel system, so 60/2 is twice the weight of standard sewing machine thread.

90/2 extra-light thread = 1.5x sewing machine threads

60/2 light thread = 2x sewing machine threads

35/2 medium thread = 3.4x sewing machine threads

25/3 heavy thread = 7.2x sewing machine threads

This same handy rule shows us that:

25/3 = 8.3

and

16/2 = 8

So 25/3 and 16/2 are very similar weights, but 25/3 is 3 ply, and 16/2 is 2 ply.

At the extreme end, hand-stitched shoes often use 8/5 to stitch on the sole, so that thread is #1.6, or the weight of 37.5 sewing machine threads bundled together!

Is that any clearer? Do you have a different way of making sense of Nel numbers?

Posted on

Saint of the Month; Saint Thomas Becket, December

Saint Thomas Becket

Feast Day; 29th of December

Probably the oldest saint to be continuously venerated and most popular saint in England throughout the medieval and renaissance period. This is the infamous ‘murdered’ saint by Henry II’s knights after the king uttered (apparently) the famous line ‘who will rid me of this troublesome priest.’

Miracles of healing from epilepsy to leprosy are attributed to the shine of St Thomas Becket..

Our replica badge is from the 14th Century and was found in London.Purchase your own replica badge for Saint Thomas Becket  https://mainlymedieval.com/product/saint-thomas-becket/

Posted on

Saint of the month; St Leonard of Noblac

Saint Leonard de Noblat

St Leonards Feast day is 6th of November. 

This month’s Saint of the Month is Saint Leonard of Noblac (also St Leonard de Noblat). A Frankish saint of the Limousin region of France, he was born 496AD and died 545AD. One of the most venerated saints of the late Middle Ages, Saint Leonards intercession was credited with miracles for the release of prisoners, women in labour and the diseases of cattle.

This replica badge is based on an original found in the France. 

Purchase your own replica badge for St Leonard of Noblac https://mainlymedieval.com/product/saint-leonard-de-noblat

Posted on

Charcoal Incense Burners

Brass Incense Burner

We’re big fans of incense. We love making it, and smelling the fragrance as it burns away on charcoal. But it’s a bit of a dying art these days. So here’s some tips about burning loose incense on charcoal.

All charcoal burners require sand at the bottom. Charcoal is an intense heat and this sudden heat can damage the burner, especially ceramic ones. A level of about a cm at the bottom is required to smooth out the heat transition.

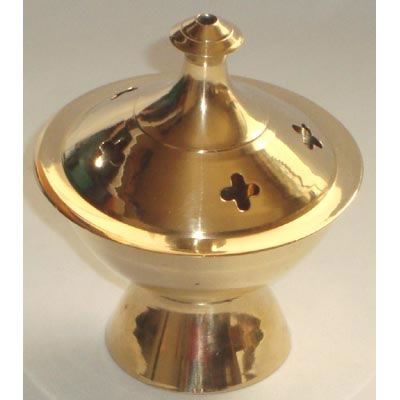
Firstly, find a good place to set the burner while it’s burning incense. (You shouldn’t move the burner once the charcoal inside). Make sure the burner is either on stone or on something which won’t mind the heat.

When lighting the charcoal, use tongs and a constant flame – either a candle, gas stove or a BBQ lighter. Once flame has touched the charcoal DON’T TOUCH THE CHARCOAL.

Lit charcoal looks extremely similar to unlit charcoal so don’t touch it if there’s a possibility it’s caught.

If you hold your hand above the charcoal, you should be able to feel the warmth emitting from it. If you’re in a quiet place, and you listen carefully, you should be able to hear a slight crackling sound – this also means that it’s caught. If you aren’t sure, put it back into the flame.

Once it’s lit, place it on the sand in the burner and then sprinkle a small amount of loose incense, or a cone, onto the charcoal tablet. The scent should release almost instantly. Be careful not to add too much or you could smother the charcoal.

A charcoal tablet burns for about 45 minutes. You may need to add more incense onto the tablet during this 45 minute period.

Our incense products

Want to learn more about charcoal burning?
Pamphlet on different types of charcoal and what they were used for

Posted on

How to Get Rid of Mould from a Canvas Tent

Canvas tents are great and authentic, but they have one key disadvantage over plastic tents. It’s not availability, cost, weight or bulk;? it’s that they are prone to mould.

So, how can you avoid the scourge of tent mould, and what should you do if it does occur?

About Mould

Mould is a type of fungi that grows in moist, dark environments. If your tent stays damp and dark for long enough, mould will flourish and spread by spores. The mould?can consume the fabric of your tent and if you try to camp in a mouldy tent, the spores can trigger asthma and allergies.

Mould Likes:
Dark
Damp
Neutral PH

Mould Hates:
Sunlight
Dry
Acid or basic PH

Avoiding Mould – Dry, Air and Store

Ideally, you’d like to not get mould in the first place. Whenever possible, the tent needs to dry completely before being put away. Check the seams and where the tent touches the ground – these are often the places that take the longest to dry.?If you do have to pack the tent up damp or wet, air the tent as soon as possible.

Air the tent by opening it right up in a spot with good ventilation. You can put the tent up, or just spread it out to dry. Ideally, air the tent in direct sunlight for extra UV treatment.

Store the tent in a dry place between events. Ideally, pack the tent loosely in a bag that breathes, rather than in plastic. Plastic helps keep water out, but if the tent goes away with any moisture at all, plastic will keep it in and foster mould.

Check your storage spot regularly. Leaky sheds, flooded garages and damp basements will ruin your next camping trip.

Dealing with Mould – Kill, Clean and Waterproof

So, you’ve unpacked your tent and found mould?- there’s discolouration, it stinks and the fabric is permanently weakened. The first step is to kill the mould and prevent further damage. Mould hates sunlight, so get that mouldy canvas into direct, burning sunlight.

Next, brush or vacuum as much of the dead mould off the fabric as possible.

Mix a solution of one part white vinegar to ten parts warm water. Using a cloth, scrub the vinegar solution over the mouldy areas. This kills any remaining mould and cleans it off the fibres. Allow the vinegar to dry completely, and then use a firm brush or a scrubbing brush again to remove the mould spots.

Check all ropes. Medieval tents have natural fibre ropes that can be easily weakened by rot. If the rope has rotted, it will need to be replaced.

Air the tent again to completely dry the cleaned area and store.

Some tents may require re-waterproofing after cleaning. In period, tent canvas swelled up when wet and became waterproof. Many modern reproductions use thin canvas with a waterproofing agent though. If you find water coming through the newly cleaned spot, head to the camping store for some canvas waterproofing agent and re-proof the cleaned area.

Prevention is Better than Cure

So, that’s how to deal with a mouldy tent. The science is simple, but the task is gross. Keep your tent dry and aired, and tent mould will be something that only happens to other people.