We’ve just had a workshop day for Mainly Medieval, going through and seeing what tasks need to be done.
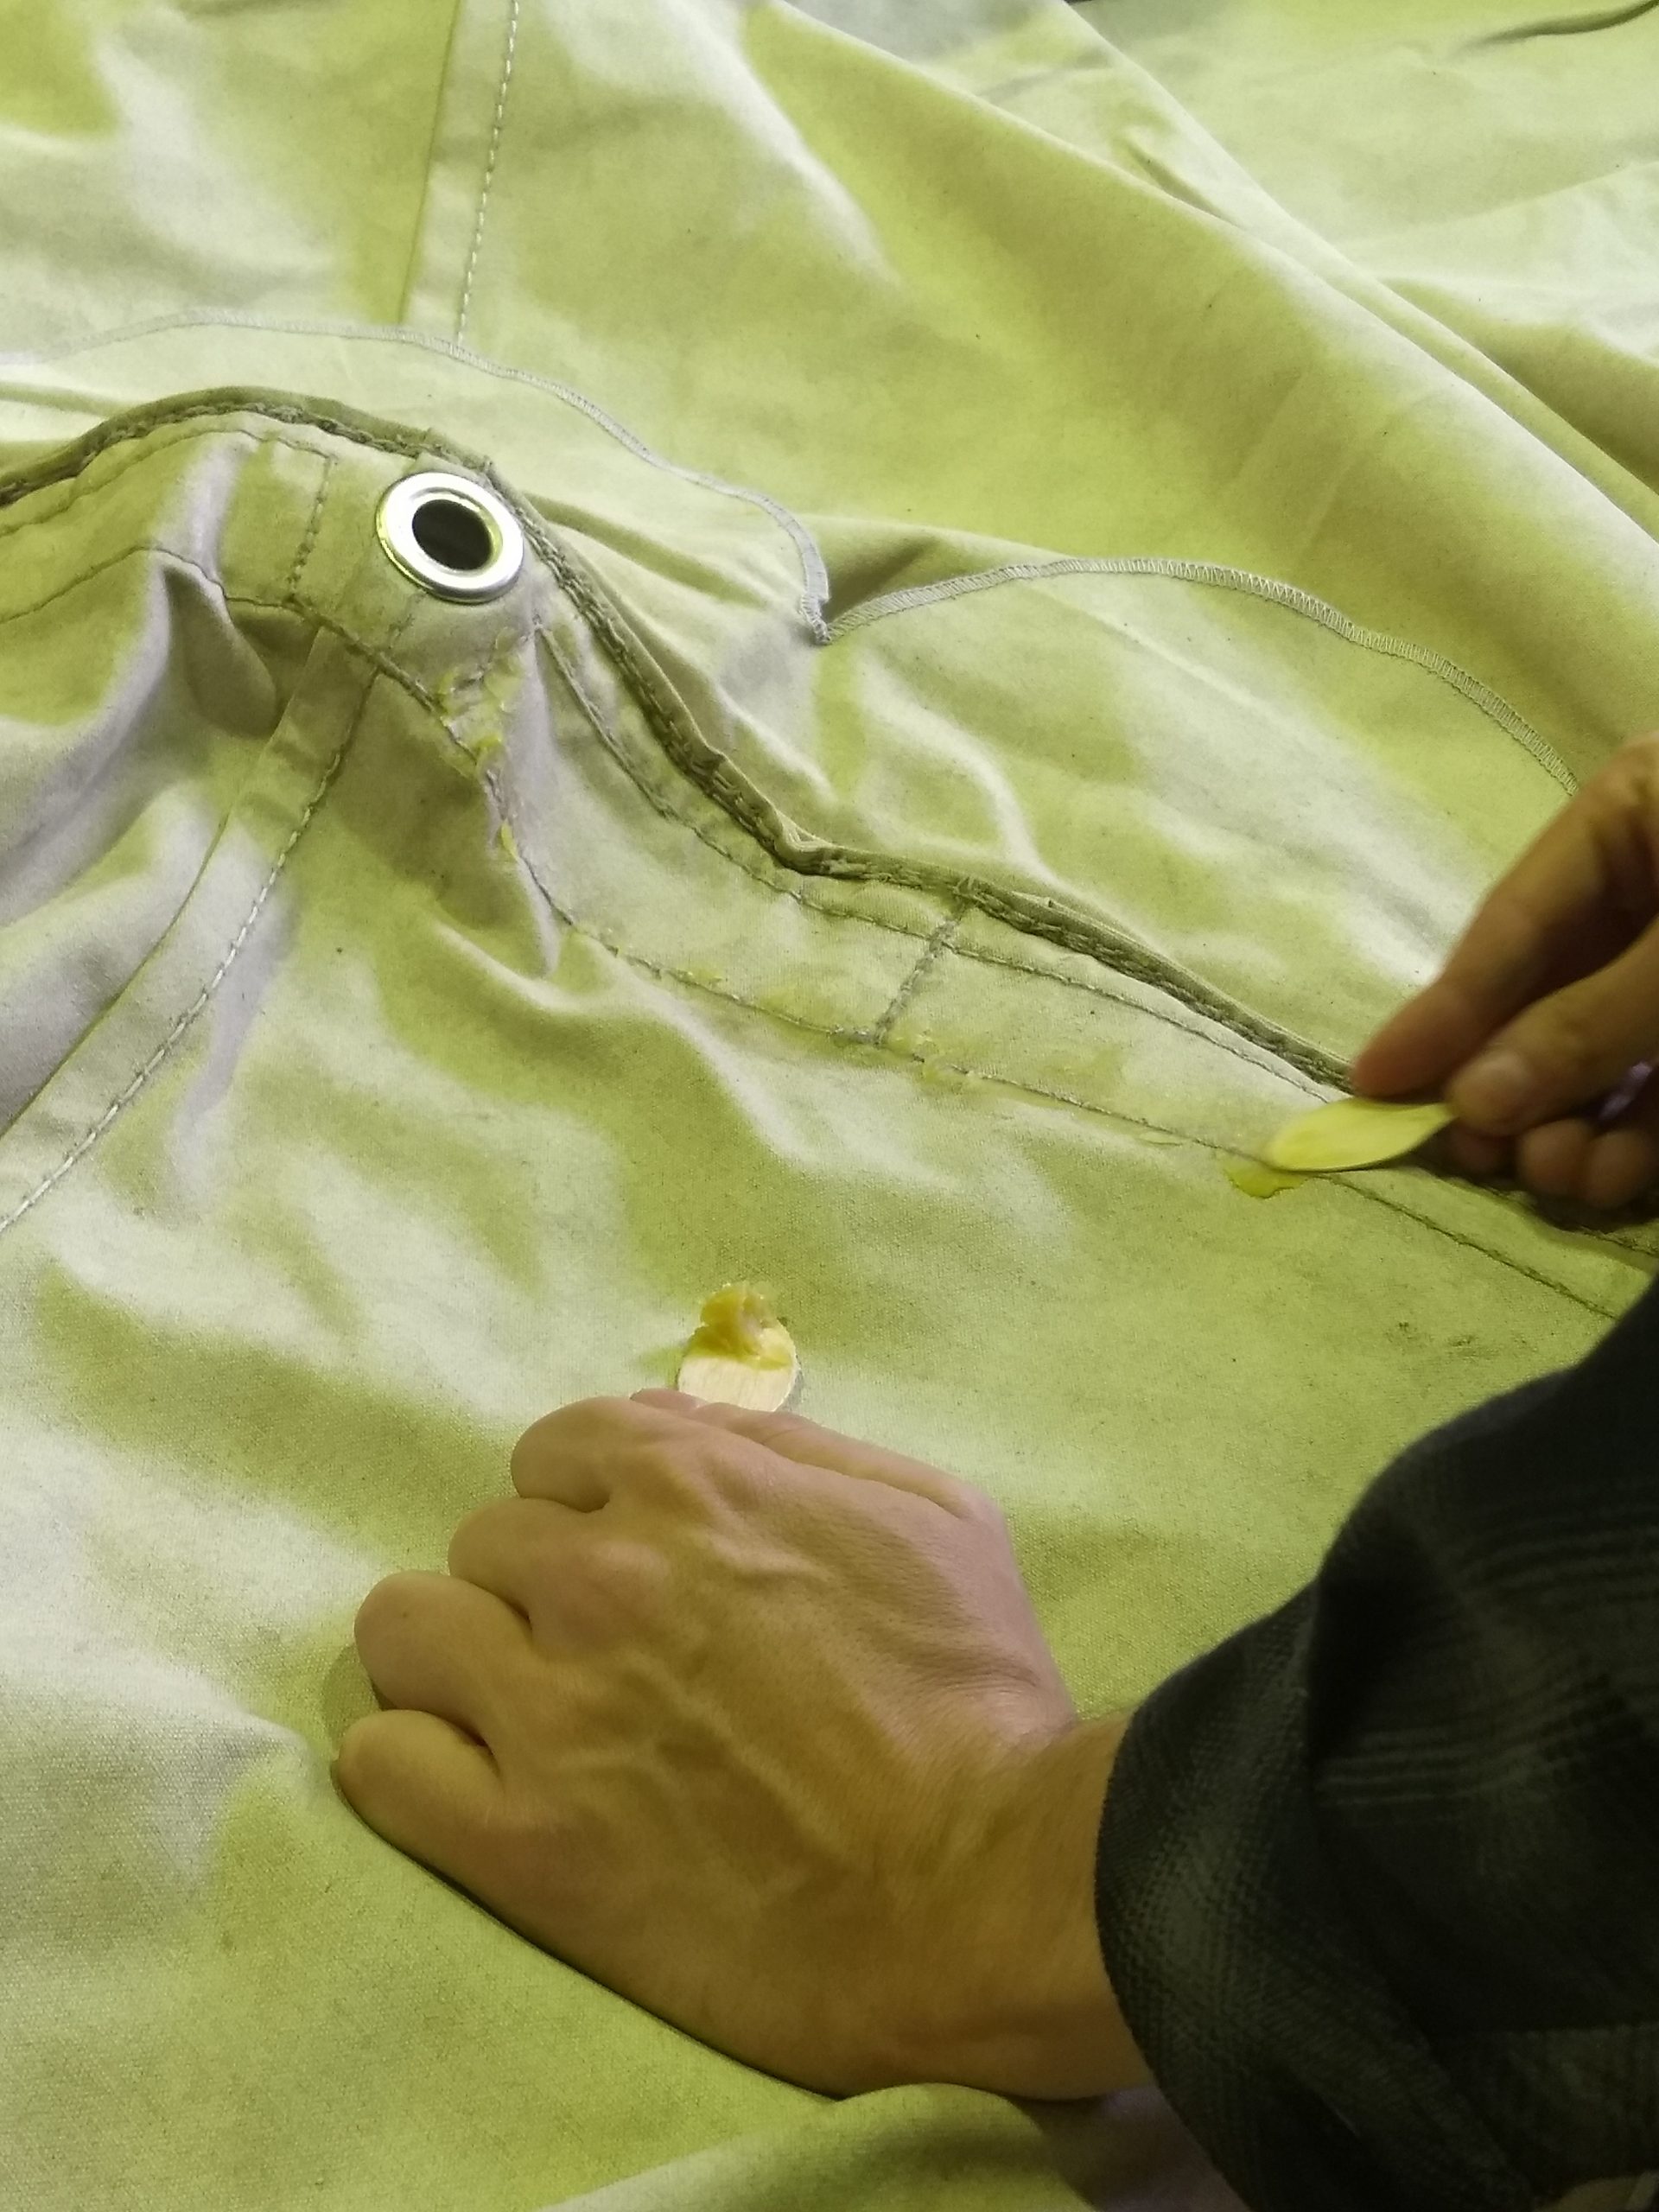
We had noticed at the last event that the old Burgundian tent (about 8 years old now) was starting to leak water in from it’s seams. So time to fix that up, books hate rain!
We used a mix of beeswax and distilled pine resin (aka pine turpentine), which meant that the beeswax was easy to work with.
Take a small scoop, rub it into the seam and burnish it into the seams with a piece of leather (or with fingers).
Canvas tents are great and authentic, but they have one key disadvantage over plastic tents. It’s not availability, cost, weight or bulk;? it’s that they are prone to mould.
So, how can you avoid the scourge of tent mould, and what should you do if it does occur?
About Mould
Mould is a type of fungi that grows in moist, dark environments. If your tent stays damp and dark for long enough, mould will flourish and spread by spores. The mould?can consume the fabric of your tent and if you try to camp in a mouldy tent, the spores can trigger asthma and allergies.
Mould Likes: Dark Damp Neutral PH
Mould Hates: Sunlight Dry Acid or basic PH
Avoiding Mould – Dry, Air and Store
Ideally, you’d like to not get mould in the first place. Whenever possible, the tent needs to dry completely before being put away. Check the seams and where the tent touches the ground – these are often the places that take the longest to dry.?If you do have to pack the tent up damp or wet, air the tent as soon as possible.
Air the tent by opening it right up in a spot with good ventilation. You can put the tent up, or just spread it out to dry. Ideally, air the tent in direct sunlight for extra UV treatment.
Store the tent in a dry place between events. Ideally, pack the tent loosely in a bag that breathes, rather than in plastic. Plastic helps keep water out, but if the tent goes away with any moisture at all, plastic will keep it in and foster mould.
Check your storage spot regularly. Leaky sheds, flooded garages and damp basements will ruin your next camping trip.
Dealing with Mould – Kill, Clean and Waterproof
So, you’ve unpacked your tent and found mould?- there’s discolouration, it stinks and the fabric is permanently weakened. The first step is to kill the mould and prevent further damage. Mould hates sunlight, so get that mouldy canvas into direct, burning sunlight.
Next, brush or vacuum as much of the dead mould off the fabric as possible.
Mix a solution of one part white vinegar to ten parts warm water. Using a cloth, scrub the vinegar solution over the mouldy areas. This kills any remaining mould and cleans it off the fibres. Allow the vinegar to dry completely, and then use a firm brush or a scrubbing brush again to remove the mould spots.
Check all ropes. Medieval tents have natural fibre ropes that can be easily weakened by rot. If the rope has rotted, it will need to be replaced.
Air the tent again to completely dry the cleaned area and store.
Some tents may require re-waterproofing after cleaning. In period, tent canvas swelled up when wet and became waterproof. Many modern reproductions use thin canvas with a waterproofing agent though. If you find water coming through the newly cleaned spot, head to the camping store for some canvas waterproofing agent and re-proof the cleaned area.
Prevention is Better than Cure
So, that’s how to deal with a mouldy tent. The science is simple, but the task is gross. Keep your tent dry and aired, and tent mould will be something that only happens to other people.