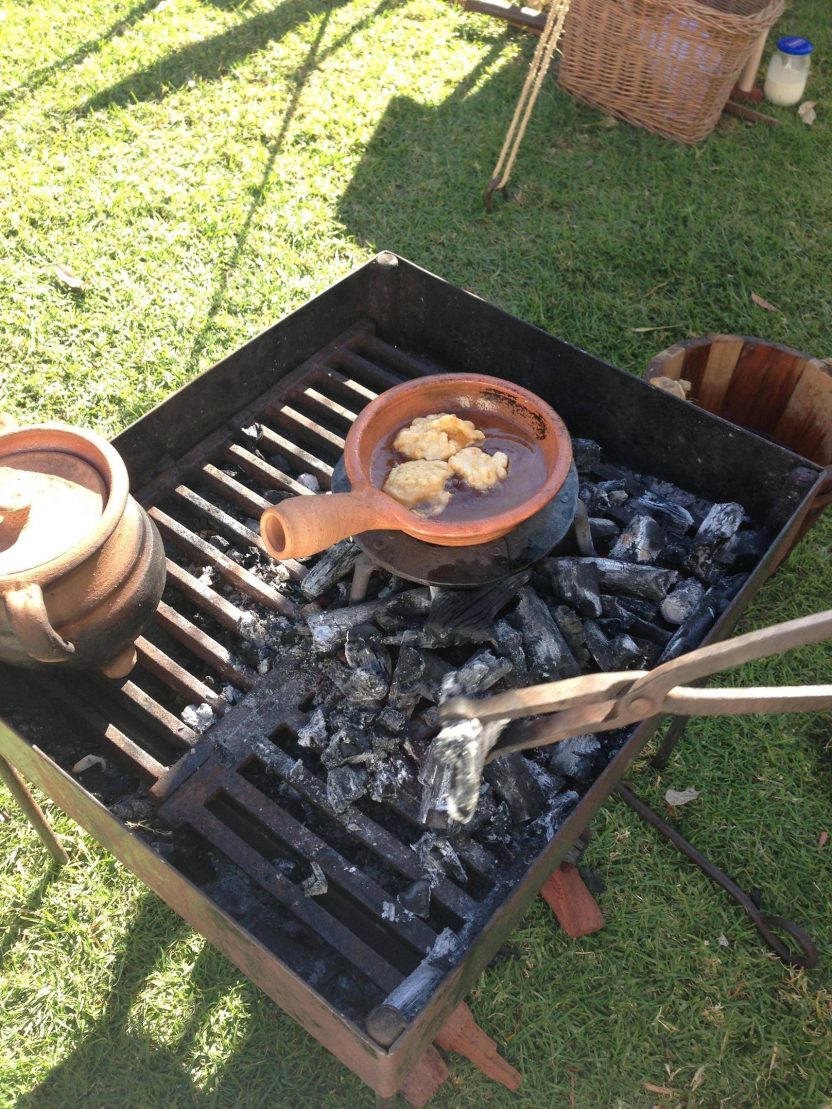
Ceramics are a great tool for use in campfire cooking. Cheap to make, there’s a reason that pottery fragments are the most common find in any archeological dig. Ceramics, particulary for use over a campfire are a lot less common now. Company of the Staple provided some great tips which they’ve kindly allowed us to reshare for everyone to spread the word about ceramic cooking.
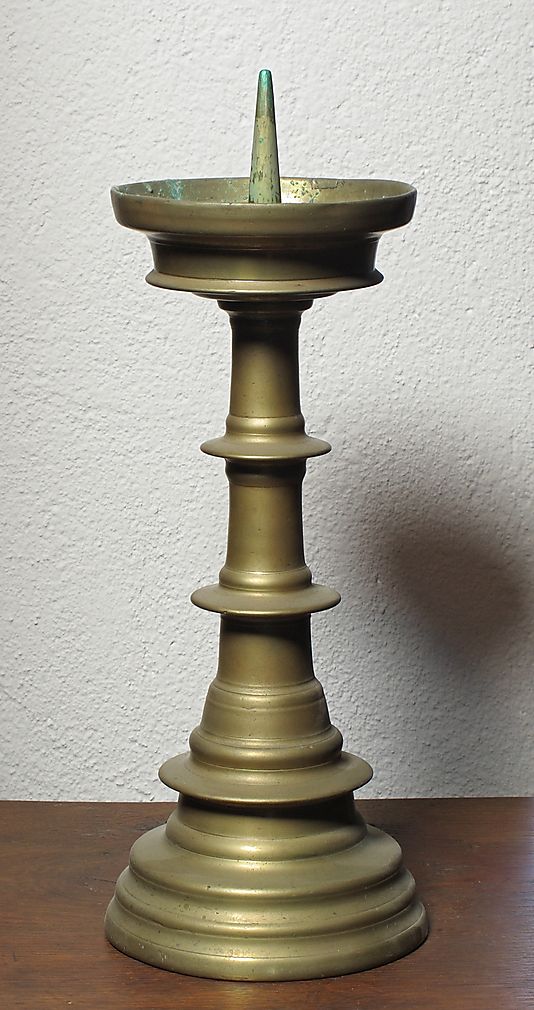
Most of us no longer use unlaquered brassware around the home, so cleaning brass is no longer a weekly task; many people have never cleaned brass! Using Brasso or brass cleaning cloths is a perfectly functional modern technique for cleaning and maintaining your reproduction brass; seriously, just follow the instructions.
However, if you have very old brass (100+ years), or prefer not to use modern chemicals, there are other alternatives. Many have been used since the medieval period right through to the 20th century. They do take more elbow grease yet the result can be as every bit as good and with the satisfaction of being envirnomentally friendly. Even more, it is a direct link with our ancestors, when cleaning brass and silvers was not just a weekly chore – it was an opportunity to gather, gossip and a little friendly competition.
Cleaning small brass pieces;
Wash the brass piece in warm soapy water to remove the worst of the accumulated grime – use an old toothbrush to assist if there are intricate patterns and undercuts;
dry thoroughly with a soft cloth – and at this point you can check to see if the piece has been laquered. Look for a yellow tinge and/or scratches which you can widen with your fingernails. If it is, skip to the section at the end;
if the brass piece is small immerse in an diluted vinegar bath (so ~ 5% acid)
leave for ~ 60 mins;
gently agitate every now and then. Don’t leave it too long as the acid can leach some elements of the brass and cause pitting;
remove the piece from the bath;
rinse thoroughly with clean water and dry with a soft cloth;
Too large for a vinegar bath? 2 period options;
as above wash the brass piece in warm soapy water to remove the worst of the accumulated grime – use an old toothbrush to assist if there are intricate patterns and undercuts;
dry thoroughly with a soft cloth – and at this point you can check to see if the piece has been laquered. If it is, skip to the section at the end;
cut a lemon in half and rub the cut end into salt;
apply this salted lemon surface FIRMLY onto the surface of the brass – it will clean off the oxidation with a bit of elbow grease;
rinse thoroughly with clean water and dry with a soft cloth, buffing the shine as you go;
Alternative 2;
make a paste from equal parts of white vinegar, salt, and white flour and use cloths and/or an old toothbrush to thoroughly cover the brass surface with the paste;
leave the paste for roughly an hour – before it dries out as that will make it very hard to remove the paste;
rinse thoroughly with clean water and dry and buff to as high a shine as you like with a soft cloth using small circular motions;
Removing laquer from old antique brass;
Gently pour hot water directly over the brass to soften the lacquer;
peel the laquer away from the edges or wherever it has started to fail – you can often see a yellow tinge to the colour of metal between the laquered and non laquered;
If hot water fails, rub the brass with denatured alcohol or acetone in a well ventilated area with a soft cloth on a part of the brass that is not seen. Stop immeadiately and rinse with water if there are any unexpected changes.
High carbon steel blades are still the choice of modern professional chefs and those who appreciate their strength, lasting edge and ease of sharpening. Very little work with a steel will hone an edge that a stainless knife can rarely achieve. Weighted correctly, with a comfortable handle and blade shape appropriate for the task, the high-carbon steel knife will outperform an equivalent stainless steel knife.
However like any quality tool, a little maintenance is required.
Basic maintenance:
– Wash knife with hot, soapy water after use;
– Dry immediately with a towel;
– Use a steel angled at 20 to 25 degrees regularly to keep the blade sharp;
– Use of a stone at intervals, will remove the microgrooves created by the steel and reset the razor sharp edge;
Storage:
– Pass a lightly oiled cloth (such as olive oil or vegetable oil) over the length of the blade and exposed metal;
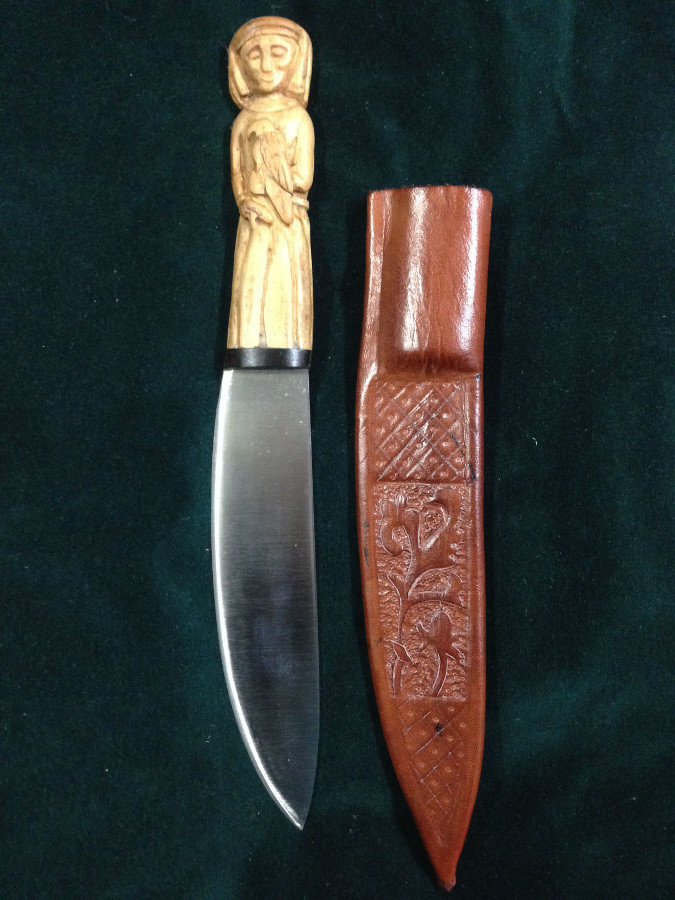
– A leather scabbard will protect the edge from damage but not always from rust. A period technique involved a second inner scabbard of oil soaked textile, loosely tacked to the edges of the leather outer scabbard.
Do Not:
– leave the blade unwashed after use; food residues will mark and pit the blade;
– wash your knife in the dishwasher; The corrosive agents used in the dishwasher powders and liquids will pit and mark both the blade and the handle, and reduce the life and appearance of the knife.
– use the knife tip as a can opener; It will break the point off.
Repairs:
– A good quality silver polish and soft cloth will remove most discolouration’s and store as above;
– an abrasive pad such as a green scourer will remove most light surface rust;
– Where there is severe rust and or discoloration, a buffing wheel will remove the stains and return the edge;
– Store as above;
The knife pictured in the feature image was hand-carved by Adam McKay in Australia. Carved in the round, it portrays a young lady with a tame bird of prey. The form is modelled from a popular theme found across Europe and Scandinavia from c. 1200-1400 of young women with birds, dogs and musical instruments. Because extant examples are invariably from ivory, this reproduction is olive wood;?a fine carving wood and fitting substitute. This knife is for sale on our shop, and similar knives can be commissioned via? our Shop.